Showing posts with label PHP. Show all posts

strtotime php-current time zone

strtotime()parsing is always done with the current time zone,
unless a different time zone is specified in the string that is parsed:
<?php
echo date("H:i T\n", strtotime("09:22")); // shows 09:22 CET
echo date("H:i T\n\n", strtotime("09:22 GMT")); // shows 10:22 CET
echo gmdate("H:i T\n", strtotime("09:22")); // shows 08:22 GMT
echo gmdate("H:i T\n", strtotime("09:22 GMT")); // shows 09:22 GMT
?>

Using the strtotime()function is easy. It accepts two parameters: the
string to parse to a timestamp and an optional timestamp. If the
 timestamp is included, the time is converted relative to the
 timestamp; if it’s not included,the current time is used. The relative
 calculations are only written with yesterday, tomorrow, and the 1
 year 2 days ago format strings.


Showing the Local Time in Other Time Zones

Showing the Local Time in Other Time Zones Sometimes, you want
 to show a formatted time in the current time zone and in
other time zones as well. The following script shows a full textual
date representation for the U.S., Norway, the Netherlands, and Israel:

<?php
echo strftime("%c\n");
echo "\nEST in en_US:\n";
setlocale(LC_ALL, "en_US");
putenv("TZ=EST");
echo strftime("%c\n");
echo "\nMET in nl_NL:\n";
setlocale(LC_ALL, "nl_NL");
putenv("TZ=MET");
echo strftime("%c\n");
echo "\nMET in no_NO:\n";
setlocale(LC_ALL, "no_NO");
putenv("TZ=MET");
echo strftime("%c\n");
echo "\nIST in iw_IL:\n";
setlocale(LC_ALL, "iw_IL");
putenv("TZ=IST");
echo strftime("%c\n");
?>

Create Login page php-Php code

 Create Login page php

<?php
            session_start();
            $host="localhost"; // Host name
            $username="username"; // Mysql username
            $password="********"; // Mysql password
            $db_name="joinfbla_services"; // Database name
            $tbl_name="members"; // Table name

            // Connect to server and select databse.
            mysql_connect("$host", "$username", "$password")or die("cannot connect");
            mysql_select_db("$db_name")or die("cannot select DB");

            // Define $myusername and $mypassword
            $myusername=$_POST['myusername'];
            $mypassword=$_POST['mypassword'];

            // To protect MySQL injection (more detail about MySQL injection)
            $myusername = stripslashes($myusername);
            $mypassword = stripslashes($mypassword);
            $myusername = mysql_real_escape_string($myusername);
            $mypassword = mysql_real_escape_string($mypassword);
            $sql="SELECT * FROM $tbl_name WHERE username='$myusername' and password='$mypassword'";
            $result=mysql_query($sql);

            // Mysql_num_row is counting table row
            $count=mysql_num_rows($result);

            // If result matched $myusername and $mypassword, table row must be 1 row
            if($count==1){

            // Register $myusername, $mypassword and redirect to file "login_success.php"
            $_SESSION['myusername'] = $_POST['myusername'];
            $_SESSION['mypassword'] = $_POST['mypassword'];
            echo 'success';
            }

            else {
            echo "Wrong Username or Password";
            }
        ?>

Php Interview-questions-with-answers
Php code for valid number
Php file uploading code
Php by code
Advanced php
Php global variables
Top 550 php interview-questions


PHP RSS feed script

PHP RSS feed script
RSS Reader PHP code

function get_feed($link)
{

    $this->load->helper('text');

    $last_update = time();

    header('Cache-Control: no-cache, must-revalidate');
    header('Expires: Mon, 26 Jul 1997 05:00:00 GMT');
    header('Content-type: application/json');

    // Load RSS Parser
    $this->load->library('rssparser');

    // Get 6 items from arstechnica
    $rss = $this->rssparser->set_feed_url($link)->set_cache_life(30)->getFeed(5);

    foreach ($rss as $item)
    {

        $pubdate = strtotime($item['pubDate']);
        $monthName = date("F", mktime(0, 0, 0, date("m",$pubdate), 10));
        $new_date = date("d.",$pubdate).' '.$monthName.' '.date("Y",$pubdate).' '.date("H:i",$pubdate);

        $array[] = array(
            'title' => $item['title'],
            'description' => character_limiter($item['description'],100),
            'author' => $item['author'],
            'pubDate' => $new_date,
            'link' => $item['link']
        );
    }

    $array = json_encode($array);

    return $array;
}

Php Interview-questions-with-answers
Php code for valid number
Php file uploading code
Php by code
Advanced php
Php global variables
Top 550 php interview-questions

PHP Functions
Php tutorial - imagemagick
php.ini Basics
PHP Sessions
Cookies Versus Sessions
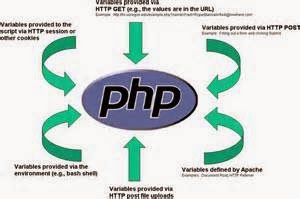
PHP Web-Related Variables
PHP ERRORS
maximum size of a file uploaded
Php Image upload
php file_get_contents
MySQL Data on the Web
What are GET and POST
php and pdf
$_ENV and $_SERVER
PEAR with php
SELECTING DATA PHP
prevent hijacking with PHP
LAMP
PHP MySQL Functions
PHP Zip File Functions
Substrings PHP
PHP Variable names
PHP magic methods
How to get current session id
Add variables into a session
$_GET , $_POST,$_COOKIE
different tables present in mysql
PHP CURL
php Sessions page
PHP-sorting an array
PHP-count the elements of array
Operators for If/Else Statements
PHP file uploading code
PHP global variables
Testing working using phpinfo
PHP Code for a Valid Number
PHP-Associative Arrays
PHP mvc tutorial
PHP get_meta_tags-Extracts
difference between print and echo
PHP best tutorial-PHP variables
Reading DOC file in PHP
PHP interview questions
convert time PHP
PHP implode array elements
header function-PHP
PHP-Renaming Files Directories
PHP Classes
in_array function in PHP
keep your session secure PHP
Web Application with PHP
What is SQL Injection
PHP-extract part of a string
PHP urlencode
PHP- know browser properties
PHP- Extracting Substrings
Checking Variable Values /Types
PHP-best 20 Open Source cms
IP AddressPHP
PHP-Scope Resolution Operator
how create new instance of object
how eliminate an object
PHP- ob_start
XML file using the DOM API
PHP- MVC
PHP- CAPTCHA
PHP- Position of a Value in an Array
PHP-Mail Functions
PHP-difference include vs require
calculate the sum of values in an array
PHP-total number of rows
Show unique records mysql
MySQL Triggers
MySQL data directory
MySQL Subqueries
PHP- Networking Functions
PHP- Operators
Restore database
Conditional Functions mysql
PHP-function overloading
Friend function
mysql_connect /mysql_pconnect
PHP-Error Control Operators
what is IMAP
Apache-Specific Functions
Send Email from a PHP Script
SQL inherently
WAMP, MAMP, LAMP
Php tutorial-SYMBOLS
Table Types-MySQL
PHP-Encryption data management
PHP Array
Running MySQL on Windows
Maximum Performance MySQL
XML-RPC
PHP-static variables
Advanced Database Techniques
FTP
Codeigniter
Apache Pool Size
Why NoSQL
MySQL Server Performance
Database software
SQL Interview Answers
PHP Redirect
PHP Interview Questions with Answers
Advanced PHP

Php Date or Time

Simplest display of date or time is telling your users what time it is.
Use the date( ) or strftime( )

strftime( ) says: Wed Oct 20 12:00:00 2004

date( ) says: Wed, 20 Oct 2004 12:00:00 -0400

Both strftime( ) and date( ) take two arguments.
The first controls how the time or date string is formatted,
and the second controls what time or date to use. 

print date('m/d/y');


The date( ) and strftime( ) functions each have their strong points.
 If you are generating a formatted time or date string that has
other text in it too, strftime( ) is better because you don't have to
worry about letters without percent signs turning into time or date values.


print 'strftime( ) says: ';
print strftime('Today is %m/%d/%y and the time is %I:%M:%S');
print "\n";
print 'date( ) says: ';
print 'Today is ' . date('m/d/y') . ' and the time is ' . date('h:i:s');


The date( ) function shines for different reasons. It supports
some things that strftime( ) doesn't, such as a leap year indicator,
 a DST indicator, and trimming leading zeroes from some values.
 Furthermore, date( ) is a PHP-specific function. The strftime( ) PHP
 function relies on an underlying operating system function also
called strftime( ). That's why some format characters aren't supported
on Windows. When you use date( ), it's guaranteed to work the same
 everywhere. Unless you need to put text that isn't format characters
 into the format string, choose date( ) over strftime( ).


Php-Configuration Control Through .htaccess

The .htaccessfile is very powerful and can control more than just
URL structure. For instance, you can control PHP configuration
options using the .htaccessfile. To increase the memory
allotted to PHP use this command:

php_value memory_limit 64M

This increases the memory limit in PHP to 64 MB.
You can also increase the max file size upload
and post size:

php_value upload_max_filesize 20M
php_value post_max_size 20M

Now the maximum file size you can post from a form and upload
is set to 20 MB. Most hosting companies set these values to
around 2 MB by default so these are settings that will be used often
for larger file uploads. Not all hosting companies will allow these
values to be set in your .htaccess file, and they could create an
error on your website if that is the case.

The .htaccessfile can also be used for security purposes.
 Using .htaccessallows you to restrict access to your website
by IP address, essentially locking it down from anonymous visitors. To lock
down your website by IP addresses, add the following code to your .htaccessfile:

AuthUserFile /dev/null
AuthGroupFile /dev/null
AuthName "Access Control"
AuthType Basic
order deny,allow
deny from all
#IP address to whitelist
allow from xxx.xxx.xxx.xxx

Replace xxx.xxx.xxx.xxx with any IP address that you want to grant
 access to your website. You can have multiple allow fromlines so add
 as many IP addresses as you need. This allows access to
your website only if you are using an IP address defined here.

Php Session Security-Internet Security

Because a session may contain sensitive information, you need to treat
 the session as a possible security hole. Session security is necessary to
 create and implement a session. If someone is listening in or snooping
 on a network, it's possible that he can intercept a session ID and use
 it to look like he is someone else. It's also possible to access session
 data from the local filesystem on multiuser systems such as ISP hosting machines.

Session hijacking is when someone accesses either a client's cookie
 or session ID, and then attempts to use this data. Session fixation
 is attempting to set your own session ID. Session fixation and
hijacking are easy to combat. We'll make use of the super global
variables for the client's IP address and browser type to keep things secure.


<?php
session_start();
$user_check = md5($_SERVER['HTTP_USER_AGENT'] . $_SERVER['REMOTE_ADDR']);
if (empty($_SESSION['user_data'])) {
session_regenerate_id();
echo ("New session, saving user_check.");
$_SESSION['user_data'] = $user_check;
}
if (strcmp($_SESSION['user_data'], $user_check) !== 0) {
session_regenerate_id();
echo ("Warning, you must reenter your session.");
$_SESSION = array();
$_SESSION['user_data'] = $user_check;
}
else {
echo ("Connection verified!");
}
?>

we stored the encoded combination of the IP address and
browser type. That way, when the user returns to this page,
we can compare the value stored in the session versus a fresh
 computation of the IP address and browser type. If the two
 don't match, we potentially have a hijacker, so we pick a new
 ID and clear out any saved data for that session. That way,
 the hijacker cannot retrieve any of the private information
stored in the session. This doesn't cause a problem for
legitimate users, because they aren't going to change browser
 or IP addresses in the middle of a session with your web site.


Building Dynamic Images-PHP

You want to create an image based on a existing image
 template and dynamic data typically text).
 For instance, you want to create a hit counter.

Load the template image, find the correct position to properly center
 your text, add the text to the canvas, and send the image to the browser:

// Configuration settings
$image    = ImageCreateFromPNG('button.png');
$text     = $_GET['text'];
$font     = ImagePSLoadFont('Times');
$size     = 24;
$color    = ImageColorAllocate($image,   0,   0,   0); // black
$bg_color = ImageColorAllocate($image, 255, 255, 255); // white

// Print centered text
list($x, $y) = pc_ImagePSCenter($image, $text, $font, $size);
ImagePSText($image, $text, $font, $size, $color, $bg_color, $x, $y);

// Send image
header('Content-type: image/png');
ImagePNG($image);

// Clean up
ImagePSFreeFont($font);
ImageDestroy($image);

Building dynamic images with GD is easy; all you need to do is combine
 a few recipes together. At the top of the code in the Solution, we
load in an image from a stock template button; it acts as the background
 on which we overlay the text. We define the text to come directly from
 the query string. Alternatively, we can pull the string from a database
 in the case of access counters or a remote server stock
 quotes or weather report icons.


<?php
if (isset($_GET['button'])) {

    // Configuration settings
    $image    = ImageCreateFromPNG('button.png');
    $text     = $_GET['button'];      // dynamically generated text
    $font     = ImagePSLoadFont('Times');
    $size     = 24;
    $color    = ImageColorAllocate($image,   0,   0,   0); // black
    $bg_color = ImageColorAllocate($image, 255, 255, 255); // white

    // Print centered text
    list($x, $y) = pc_ImagePSCenter($image, $text, $font, $size);
    ImagePSText($image, $text, $font, $size, $color, $bg_color, $x, $y);

    // Send image
    header('Content-type: image/png');
    ImagePNG($image);


    // Clean up
    ImagePSFreeFont($font);
    ImageDestroy($image);

} else {
?>
<html>
<head>
    <title>Sample Button Page</title>
</head>
<body>
    <img src="<?php echo $_SERVER['PHP_SELF']; ?>?button=Previous"
         alt="Previous" width="132" height="46">
    <img src="<?php echo $_SERVER['PHP_SELF']; ?>?button=Next"
         alt="Next"     width="132" height="46">
</body>
</html>
<?php
}
?>
If a value is passed in for $_GET['button'], we generate
 a button and send out the PNG. If $_GET['button'] isn't set, we print
 a basic HTML page with two embedded calls back to the script with
 requests for button images — one for a Previous button and one for
 a Next button. A more general solution is to create a separate
 button.php page that returns only graphics and set the image
source to point at that page.


MySQL with php

The basic steps of performing a query, whether using the mysql
command-line tool or PHP, are the same:

Connect to the database.

Select the database to use.

Build a SELECT statement.

Perform the query.

Display the results.


When connecting to a MySQL database, you will use two
 new resources. The first is the link identifier that holds all
of the information necessary to connect to the database for
an active connection. The other resource is the results resource.
It contains all information required to retrieve results from an
active database query's result set.


<?php
$db_host='hostname of database server';
$db_database='database name';
$db_username='username';
$db_password='password';

$connection = mysql_connect($db_host, $db_username, $db_password);
if (!$connection){
die ("Could not connect to the database: <br />". mysql_error());
}

$db_select = mysql_select_db($db_database);
?>

Building a SQL query is as easy as setting a variable to the
string that is your SQL query. Of course, you'll need to use a
valid SQL query, or MySQL returns with an error when you
execute the query. The variable name $query is used, but you
can choose anything you'd like for a variable name.
The SQL query in this example is
SELECT * FROM tbl.


Sorting Arrays-PHP


PHP supports a variety of ways to sort an array when 
I say sort, I am referring to an alphabetical sort if it is a string,
 and a numerical sort if it is a number. When sorting an array, 
you must keep in mind that an array consists of several pairs 
of keys and values. Thus, an array can be sorted based upon
 the values or the keys. Also, you can sort the values and keep 
the corresponding keys matched up or sort the values and 
have them receive new keys.
To sort the values, without regard to the keys, 
you use sort(). 
 To sort these values again without regard to the keys,
 in reverse order, you use rsort(). 
The syntax for every sorting function is like this:

function($Array);
So, sort() and rsort() are simply:
sort($Array);
rsort($Array);
 
To sort the values, while maintaining the correlation
 between the value and its key, you use asort(). 
To sort them in reverse, while maintaining the key
 correlation, you use arsort().
To sort by the keys, while still maintaining the correlation
 between the key and its value, you use ksort(). 
Conversely, krsort() will sort the keys in reverse.
Last, shuffle() randomly reorganizes the order of an array.

As an example of sorting arrays, you'll create a list of students
 and the grades they received on a test, then sort this list first
 by grade then by name.

Create the array:
 
$Grades = array(
"Richard"=>"95",
"Sherwood"=>"82",
"Toni"=>"98",
"Franz"=>"87",
"Melissa"=>"75",
"Roddy"=>"85"
);


 Print a caption and then print each element of 
the array using a loop.

print ("Originally, the array looks
 like this:<BR>");
for ($n = 0; $n < count($Grades);
 $n++) {
   $Line = each ($Grades);
   print ("$Line[key]'s grade is
 $Line[value].<BR>\n");
}


Sort the array in reverse order by values to determine 
who had the highest grade.

arsort($Grades);
 
Because you are determining who has the highest 
grade, you need to use arsort() instead of asort(). 
The latter, which sorts the array by numeric order, would 
order them 75, 82, 85, etc. and not the desired 98, 95, 87, etc.

php-Dynamic Variables

Sometimes it is useful to set and use variables dynamically. 
Normally, you assign a variable like this: 

$var = "hello";
 
Now let's say you want a variable whose name is the 
value of the $var variable. You can do that like this:

$$var = "World";
 
PHP parses $$var by first dereferencing the innermost 
variable, meaning that $var becomes "hello". The 
expression that's left is $"hello", which is just $hello.
 In other words, we have just created a new variable 
named hello and assigned it the value "World"
You can nest dynamic variables to an infinite level in 
 PHP, although once you get beyond two levels, it 
can be very confusing for someone who is trying to read your code.
There is a special syntax for using dynamic variables, and 
any other complex variable, inside quoted strings in PHP: 

echo "Hello ${$var}";
 
This syntax also helps resolve an ambiguity that occurs when
 variable arrays are used. Something like $$var[1] is 
ambiguous because it is impossible for PHP to know which
 level to apply the array index to. ${$var[1]} tells 
PHP to dereference the inner level first and apply the 
 array index to the result before dereferencing the outer level.
 ${$var}[1], on the other hand, tells PHP to apply the index
 to the outer level.
Initially, dynamic variables may not seem that useful, but there
 are times when they can shorten the amount of code you need 
to write to perform certain tasks. For example, say you have 
an associative array that looks like: 

$array["abc"] = "Hello";
$array["def"] = "World";
 
Associative arrays like this are returned by various functions
 in the PHP modules. mysql_fetch_array() is one example.
 The indices in the array usually refer to fields or entity names 
within the context of the module you are working with. It's
 handy to turn these entity names into real PHP variables, 
so you can refer to them as simply $abc and $def

security to POST-PHP

$_POST
 POST-method variables. Form field data from regular 
POST-method forms.
 
PHP automatically creates variables for all the data it receives
 in an HTTP request. This can include GET data, POST data,
 cookie data, and environment variables. The variables are 
either in PHP's global symbol table or in one of a number
 of superglobal arrays, depending on the value of the
 register_globals setting in your php.ini file. 

mysqli_real_escape_string can be add for security reson.

A common error people make when using sessions is that they
 tend to use it as a replacement for authentication -- or sometimes 
as an add-on to authentication. Authenticating a user once as he
 first enters your site and then using a session ID to identify that 
user throughout the rest of the site without further authentication 
can lead to a lot of problems if another person is somehow able
 to get the session ID. There are a number of ways to get the 
 session ID:
  • If you are not using SSL, session IDs may be sniffed
  • If you don't have proper entropy in your session IDs,
     they may be guessed
  • If you are using URL-based session IDs, they may 
    end up in proxy logs
  • If you are using URL-based session IDs, they may 
    end up bookmarked on publicly-accessible computers
Forcing HTTP Authentication on each page over SSL is the
 most secure way to avoid this problem, but it tends to be a 
bit inconvenient. Just keep the above points in mind when 
building a web application that uses sessions to store users' 
personal details.

PHP Expressions

An expression is the basic building block of the language.
 Anything with a value can be thought of as an expression. 
Examples include:
5
5+5
$a
$a==5
sqrt(9)
By combining many of these basic expressions, you can
 build larger, more complex expressions.
Note that the echo statement we've used in numerous 
examples cannot be part of a complex expression because
 it does not have a return value. The print statement, on
 the other hand, can be used as part of complex expression
 -- it does have a return value. In all other respects, echo 
and print are identical: they output data.

Expressions are combined and manipulated using operators.

The control structures in PHP are very similar to those
 used by the C language. Control structures are used to 
control the logical flow through a PHP script. PHP's control 
structures have two syntaxes that can be used interchangeably. 
The first form uses C-style curly braces to enclose statement 
 blocks, while the second style uses a more verbose syntax 
that includes explicit ending statements. The first style is 
preferable when the control structure is completely within 
a PHP code block. The second style is useful when the 
construct spans a large section of intermixed code and 
HTML. The two styles are completely interchangeable, 
however, so it is really a matter of personal preference 
which one you use. 

The if statement is a standard conditional found in most languages.
 Here are the two syntaxes for the if statement:
if(expr) {            if(expr):
  statements            statements
} elseif(expr) {      elseif(expr):
  statements            statements
} else {              else:
  statements            statements
}                     endif;
The if statement causes particular code to be executed if
 the expression it acts on is true. With the first form, 
you can omit the braces if you only need to execute a 
single statement.


how Installing mod_rewrite localhost

If you’ve installed Apache yourself, read on. Because of its
 popularity, mod_rewrite is now included with all common
 Apache distributions. If desired, you can verify if your Apache installation has the
mod_rewrite module by looking for a file named
mod_rewrite.sounder the modulesfolder in your
Apache installation directory.

However, mod_rewrite may not be enabled by default
 in your Apache configuration. To make sure,open the
Apache configuration file, named httpd.conf. If you’ve
 installed Apache using the XAMPP
the full path of the file will be
\Program Files\xampp\apache\conf\httpd.conf.
Open httpd.confand find the following line:
#LoadModule rewrite_module modules/mod_rewrite.so
The leading #means the line is commented, so remove it
 in order to have Apache load the mod_rewrite
module upon its startup:
LoadModule rewrite_module modules/mod_rewrite.so

After any change to httpd.conf, you need to restart the
 Apache server in order for the changes to take
effect. In case you run into trouble, you can check
Apache’s error log file (/logs/error.log), which
should contain the details of the error.

Once mod_rewrite is installed and enabled, you
add the rewriting rules to the Apache configuration
file, httpd.conf. Apache also lets you save configuration
 options including rewriting rules on a
per-directory basis to a configuration file named .htaccess.
 All you have to do is create a file named .htaccessinto a
 directory of your application, and Apache will read it
automatically when accessing that directory.

PHP while Loop

PHP while Loop with code


while - loops run  a set of code as  the  condition is true.

Basic Syntax
while (condition)
{
    code for executed;
}

<?php
$k=1;

while($k<=5) {
  echo "The number is: $k <br>";
  $k++;
}
?>

$k start with 1 and run 5 times as the k++
It continues to loop through the code  until the condition becomes false.

var_dump and print_r -PHP-standard

Functions like var_dump and print_r are also invaluable when debugging

var_dump

var_dump functions displays information about variables in a simple, readable 
format. This function is very useful when debugging—providing a simple
 and easy way to display the current contents of one or more variables.

For simple scalar variables such as booleans, integers, strings, and doubles,
 the type of the variable is printed, followed by an opening bracket, the value
 contained in the variable, and a closing bracket.

Arrays are printed as a list of keys and values, and have their type array
 printed at the top of the list.

print_r

print_r displays information about a variable in a format meant to
 be easily understandable by humans. It is often used for debugging—
providing a simple and easy way to display the current contents of a variable.
 However, var_dump provides more complete information and allows
 for the use of multiple arguments.
For simple scalar variables, such as booleans, integers, strings, 
and doubles, the value contained in the variable is printed.

If print_r is used on a data structure that is a reference to itself, 
the function enters a recursive loop—generating the same information
 repeatedly until the script times out or the user cancels the script.

Visualize Traffic with DIY Vector

you will learn how to create your own traffic chart using the incredibly cool Canvas framework, which can produce vector graphics and animations with a little bit of HTML and JavaScript. All code referenced in this hack is also available in a single zip file at http://blogoscoped.com/googleappshacks/canvas.zip. Although setting up Canvas may take a little longer than using, say, the Google Charts API  it's also much more flexible, and can even include animated charts.

Draw Something Using Canvas

Canvas is a vector graphics framework which works in most popular browsers today including Firefox, Opera and Safari, and does not require a plug-in like Flash does. Internet Explorer too can render Canvas code, at least with a little tweak you'll see further below. Canvas can be used to have a web page show 2D and 3D drawings, games, charts, applications, animations, and much more.

A longer canvas tutorial is available at http://developer.mozilla.org/en/docs/Canvas_tutorial (explaining how to draw rectangles, curves, imported images, and much more), but let's just see what you need to draw a simple line. First, create a file named index.html and open it with a plain text editor. Create a basic page like the following;

 
<!DOCTYPE html PUBLIC "-//W3C//DTD XHTML 1.0 Strict//EN" "DTD/xhtml1-strict.dtd">
<html xmlns="http://www.w3.org/1999/xhtml" xml:lang="en" lang="en">
<head>
  <meta http-equiv="Content-Type" content="text/html; CHARSET=UTF-8" />
  <title>Drawing a line</title>
</head>
<body>
  <h1>Soon, a line will appear!</h1>
</body>
</html>


So far, that's all plain XHTML. Now somewhere in the <body> of the page, put the canvas tag:

Next, create a default.js file containing the following JavaScript, and put it in the same folder as index.html:
function main() {
    // grab the canvas
    var canvas = document.getElementById('picture');
    var ctx = canvas.getContext('2d');

    // set the color and line width
    ctx.strokeStyle = 'rgba(40,200,180,1)';
    ctx.lineWidth = 8;

    // draw a line
    ctx.beginPath();
    ctx.moveTo(40, 140);
    ctx.lineTo(240, 40);
    ctx.stroke();
}

That's not a lot of code—you're grabbing the canvas element using the ID you defined

URL rewriting-various exercises-seo

 Installing mod_rewrite
 Testing mod_rewrite
 Working with regular expressions
 Rewriting numeric URLs with two parameters
 Rewriting keyword-rich URLs
 Building a link factory
 Pagination and URL rewriting
 Rewriting images and streams

If you’ve installed Apache yourself, read on. Because of its popularity, mod_rewrite is now included
with all common Apache distributions. If desired, you can verify if your Apache installation has the
mod_rewrite module by looking for a file named mod_rewrite.sounder the modulesfolder in your
Apache installation directory.
However, mod_rewrite may not be enabled by default in your Apache configuration. To make sure,
open the Apache configuration file, named httpd.conf.

Once mod_rewrite is installed and enabled, you add the rewriting rules to the Apache configuration
file, httpd.conf.

You use this to have mod_rewrite translate my-super-product.htmlto product.php?product_id=123.
The linethat precedes the RewriteRuleline is a comment.
# Translate my-super.product.html to /product.php?product_id=123
RewriteRule ^my-super-product\.html$ /product.php?product_id=123
You can find the official documentation for RewriteRuleat http://www.apacheref.com/
ref/mod_rewrite/RewriteRule.html.
In its basic form, RewriteRuletakes two parameters. The first parameter describesthe original URL that
needs to be rewritten, and the second specifies what it should be rewritten to. The pattern that describes the
original URL is delimited by ^and $, which assert that the string has nothing before or after the matching
text (explained further in the following sections), and its contents are written using regular expressions,
which you learn about next.

Using RewriteBase

The regular expressions and scripts in this book assume that your application runs in
the root folder of their domain. This is the typical scenario. If, however, you host your
application in a subfolder of your domain, such as
http://www.example.com/seophp, you’d need to make a few changes to accommodate 
the new environment.

The most important change would be to use the RewriteBasedirective of mod_rewrite
to specify the new location to act as a root of your rewriting rules. This directive is
explained at http://www.apacheref.com/ref/mod_rewrite/RewriteBase.html.
Also, the rewritten URL should lose its leading slash, because you’re not rewriting to
root any more. Basically, if you host your first example in a subfolder named seophp,
your .htaccessfile for the previous exercise should look like this:

RewriteEngine On
RewriteBase /seophp
RewriteRule ^my-super-product\.html$ product.php?product_id=123

RewriteRule command and its parameters must be written on a single line in
your .htaccessfile. If you split it in two lines as printed in the book, you’ll get a 500 error from the
web server when trying to load scripts from that folder.

How to Enable mod_rewrite at Server

mod_rewrite may not be enabled by default in your Apache configuration. To make sure,
open the Apache configuration file, named httpd.conf.
The full path of the file will be \Program Files\xampp\apache\conf\httpd.conf.

Open httpd.conf and find the following line:
#LoadModule rewrite_module modules/mod_rewrite.so
The leading #means the line is commented, so remove it in order to have Apache load the mod_rewrite
module upon its startup:

LoadModule rewrite_module modules/mod_rewrite.so

After any change to httpd.conf, you need to restart the Apache server in order for the changes to take
effect. In case you run into trouble, you can check Apache’s error log file /logs/error.log, which
should contain the details of the error.

Once mod_rewrite is installed and enabled, you add the rewriting rules to the Apache configuration
file, httpd.conf. Apache also lets you save configuration options (including rewriting rules) on a
per-directory basis to a configuration file named .htaccess. All you have to do is create a file named
.htaccessinto a directory of your application.

what is CodeIgniter Helpers?

Helpers, as their name implies, help you with specific tasks. Unlike libraries, helpers are not object -oriented but procedural in nature. Each helper contains one or more functions, each focusing on a
specific task, with zero dependence on other functions.

Helpers can either be loaded locally or autoloaded in /system/application/config/autoload.php.

CodeIgniter's  helpers:

Array —  The   Array helpercontains functions that help you work with arrays. For example, the
random_element()function takes an array as input and returns a random element from it.

Cookie —  The   Cookie helpercontains functions that help you set, read, and delete cookie data.

Date —  The   Date helpercontains functions that help you work with dates. For example, the
now function returns the current time as a UNIX time stamp.

Directory —  The   Directory helpercontains a single function that helps you work with directories.
For example, the directory_mapfunction reads a specified directory path and builds an array
of it that contains all of its files and subdirectories.


Download —  The   Download helpercontains a single function that helps you download data
easily. The force_download()function generates server headers that force data to be
downloaded instead of viewed in a browser.

File —  The   File helpercontains functions that help you read, write, and delete files.

Form —  The   Form helpercontains functions that help you build forms. It is probably one of the
most used helpers in the CodeIgniter toolbox.

HTML —  The   HTML helpercontains functions that help you create HTML blocks quickly and
easily. For example, the ul()function can turn an array of items into a bulleted list.

Inflector —  The   Inflector helpercontains functions that help you to turn words into plural or
singular form, to apply camel case, or to turn words separated by spaces into an underscored
phrase.

Security —  The   Security helpercontains security - related functions like xss_clean(),  which
filters out any code that may be used in a cross site scripting hack.

Smiley —  The   Smiley helpercontains functions that help you manage emoticons. The functions
in this helper might seem superfluous, but become invaluable if you are coding a bulletin board
or chat application.

String —  The   String helpercontains functions that help you work with strings, like the random_
string  function, which as its name implies, creates random strings based on type and length
arguments.

Text —  The   Text helpercontains functions that help you work with text. For example, the word_
limiter function can limit a string to a certain number of words, which is useful if you ’ re
trying to limit user input on a form.

Typography —  The   Typography helpercontains a single function that helps you format text in
appropriate ways. For example, the auto_typography()function wraps paragraphs with < p >
and < /p > , converts line breaks to < br/ > , and converts quotes, dashes, and ellipses properly.

PHP, you can use the substr()function instead of the word_limiter or character_limiter
made available by the Text helper. Certainly, you ’ re not forced to use helpers, but they ’ re made available
to you, and they do a fine job of saving time and effort.